
Thank you so much for purchasing a set of my lekku! Please see this twi’lek lekku guide and tutorial on how to prep, care for, and store your new lekku!
Links in this article are affiliate links, which means that I may make a (VERY) small amount of money off of any purchases that come from clicking those links! I was not paid to promote any of these products specifically, they are my honest recommendations based on my personal experience.


Upon Receipt…
As soon as the box gets to you, unpack her and make sure the lekku didn’t get crinked or bent during shipping. If any bends did occur, gently squeeze the foam firmly for five seconds, then release it. Allow a few minutes for the lekku to fully reinflate; repeat if necessary.
If there is ANY damage to the lekku from shipping, please let me know ASAP!
How to Paint
Paint to use:
Because of the flexible nature of the lekku, it is imperative that any paint or coating you put on the lekku is as flexible as the lekku itself. I DO NOT recommend coating these lekku in Plastidip — in my experience, the lekku are far more flexible than the Plastidip and this will cause it to crack.
You can use one of the following:
Non-permanent options:
1. Make-up – if you’re going skin colored, just use the same foundation as you use on your face. I do recommend using a thin layer of either ProsAide or an adhesion promoter and then sealing with setting spray to ensure that the foundation stays in place.
- Createx Adhesion Promoter: apply first, then put makeup on top and then seal with normal setting or sealing spray
2. Bodypaint — For exact color matching, you can use the very same bodypaint that you’re using on yourself on your lekku. Whether water- or alcohol-based, bodypaint will remain flexible when dried so is a great option. Just be warned that even if you seal or set the paint, you’re likely to have to touch it up on a regular basis. Bodypaint is also a great option if you want to remove the paint and re-paint your lekku in a different color!
- Wolfe Brand Bodypaint: water based, great for sensitive skin, cheap
- EBA Endura: alcohol based, water proof, comfortable
- Proaiir Hybrid: water proof, gentle
Pro-tip: You can use a paint adhesion promoter as a base layer to make your bodypaint stay a bit longer and be more durable than straight bodypaint! This is my method of painting.
Permanent options:
1. Acrylic paint — Not just any acrylic paint will do. I recommend Liquitex, a brand of paint that is mixed with latex, resulting in a high pigment, flexible paint. Remember to try and do as thin a layer as possible, since thicker layers will crack.
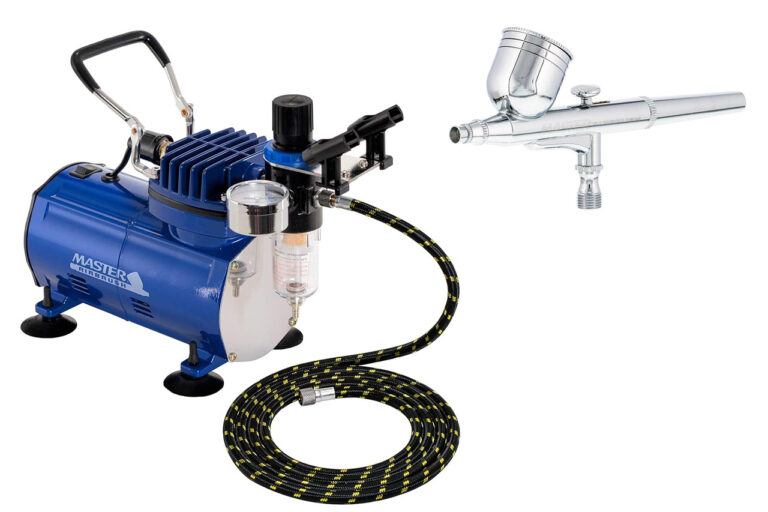
2. Airbrush acrylic paint — I use Createx airbrush paint, but there are other types of airbrush acrylics out there. Just make sure they remain, again, flexible when dried. It is much easier to get a thinner layer using airbrush paints.
To paint, you can either hand paint or use an airbrush.
Handpainting:
Pros:
- Easier to do fine details such as geometric tattoos or any designs with a sharp edge
- Cheaper — all you need to get going is your paint and some brushes.
Cons:
- Time consuming, will take much longer than airbrushing
- Difficult to make sure that your coats are thin, meaning paint jobs are much more likely to crack
Airbrushing
Pros:
- Much easier to get an even, light coat with a minimum of pigment use
- Faster than handpainting by far
- It is far easier to blend and make gentle gradient style markings
Cons:
- Sharp designs or clean edges require precision with a fine tip or stencils
- Requires an airbrush set-up
Other Tools for Painting
Reference Photos/Art — it doesn’t have to be of twi’leks, it can be of animals or fabric print or just about anything. Simply having a ‘good plan’ ahead of time will make the painting less stressful and more streamlined.
Stencils — one of the best tools for any painter are stencils that you can use both with handpainting and airbrushes. Find them online or create your own using cut-out foam or even fabric with a pattern already in it.
Final Tips/Thoughts
When painting a design, you can use a color a shade lighter than your base to mark out “key points” of your design. That way if you change your mind or need to adjust, you can easily cover the markings — much more easily than if you use, say, black marks on white or vice versa!
If you’re not completely sold on a color or design, consider using your bodypaint initially. This way you can remove it if you decide you want to change your mind. This will make it easier to match to you when you actually paint up as well. Just keep in mind that this will require a LOT of bodypaint initially and constant upkeep, so if you’re sure of your color or design you’ll save more money in the long run using acrylic paints instead.
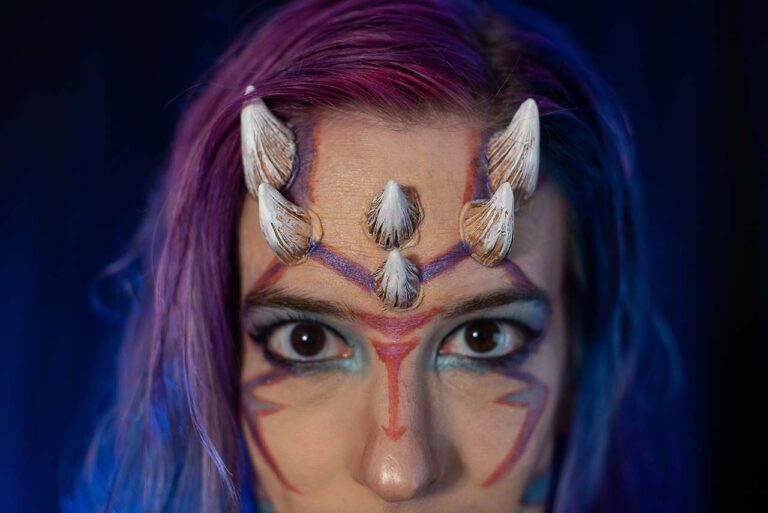
A final note on “Canon” versus “NonCanon”
It is always nice to find reference material that is considered canon — ie from the movies, cartoons, or canonized video games. That being said, unless your goal is to go for approval with one of the charity clubs, don’t feel restricted to just what you see in canon sources. The beauty and fun of twi’leks are that they come in every color and combination — don’t be shy to be bold and creative!
Prepping to Wear
Your new set of lekku is almost ready to go — but first we need to prep it to wear. This involves figuring out your headband and ripping out the foam in the inside of the headpiece.
First, let’s talk about the foam.
Ultimately, you want to rip out just enough foam from the inside that it sits comfortably in place but not so much that there is excess space. People ask me “Well how it SUPPOSED to sit?” and the answer is a bit up to you. I designed the lekku so that they stick straight out from the back of the head, so the top of the head cavity should sit down against the top of your head. If you like lekku that stick up a bit higher or hang a bit lower, though, please feel free to adjust accordingly.
- Position your lekku with one hand on the outside of the head cavity. This will allow you to feel if you’re getting too close to ripping the surface.
- With your other hand, tear small strips or bits of foam at a time. You can use scissors or a knife to create an initial gash if that helps.
- Try your lekku on frequently. Remember that the foam will pad down just a tad when you wear your lekku for the first few times.
What about hair?!
There are two main ways of dealing with long hair underneath your lekku.
The first is to braid your hair in two pigtail braids. Then wrap the braids around, opposite each other, using either bobbypins or a wig cap to keep the braids flat against your head. This won’t work well if the lekku cap is exceedingly tight.
The other way is to rip out “pockets’ for where your hair will sit. With the lekku, you can rip out two small indents in each of the lekku. Then, simply put your hair up in two buns, cover with a wig cap to keep flyaways handled, and when you put your lekku on your buns should go right into the spaces made for them.
On the opposite end of the spectrum, if you have little to no hair, you may find that the lekku shift or slide on your head. I recommend a nice, soft wig cap or headband made to go under wigs. It will absorb any sweat and keep your lekku nicely in place.
Wrap It Up
Once you have the inside of your lekku made comfortable, the next step is to figure out your headwrap.
You can either make your own or commission one. To make your own, you can create your own pattern using a duct tape dummy, or purchase a preexisting once such as mine here:
-
Hera’s Hat Pattern
$10.00 -

Twi’lek Headband Patterns
$10.00
Just about any type of fabric can be used for a headwrap, depending on how you want it to look. I use four way stretch material when I want a headwrap that is tight and sleek. For headwraps that have a bit more structure, two way stretch vinyl or even pleather work fantastically.
Either way, try and create your headwrap so that your earbuds sit just over your existing ears — this will help the earbuds look natural.
Long Term Care and Storage
Your lekku have a finite lifespan – no matter how good of care you take of them, latex degrades overtime and will eventually need to be replaced. That being said, caring for and storing your lekku correctly will greatly increase their lifespan.
Caring For Your Lekku
After every time you wear your lekku, make sure that they fully air and dry out of any moisture (such as sweat) before they’re packed away. I do not recommend washing the interior of the lekku, but you can use a mixture of water and vodka sprayed inside and fully dried to help with removing any smells from the foam.
If they get dirty, you can spot clean the outsides with soap and water, then patch up the paint using your original painting method. Just make sure it all dries completely before storing your lekku.
Mending Tears
It is inevitable that your lekku will sustain some wear and tear, but hopefully you never have to deal with rips or tears. In the cast that you do, you can mend small rips or tears with a little extra work.
- Liquid Latex – liquid latex is both a sealant and a glue. If there is a small rip or tear, you can apply some liquid latex to it and then hold it in place until it is dried. This method is great for preserving the flexibility of an area, but be careful that you don’t get any big drips or runs from it.
- Barge Contact Cement – the glue I use, this is my go-to for any repairs. Apply a thin layer to each side of the damage and let it dry to tacky (it will soak into the foam and you want this). Then gently press the two sides together. This will provide an instant fix, though any surface damage will need to be cleaned up or masked.
For any bigger damage, please don’t hesitate to message me with questions!
Storing Your Lekku
The most important thing to keep in mind when storing your lekku is to store them somewhere cool, out of sunlight, and supported in shape. Heat will cause the latex to become brittle. Sunlight will cause the latex to darken and snap apart. And the foam will snap back from most shapes but the longer the lekku are folded or bent, the longer and less likely it will be that the foam will fully recover.
I tend to store my lekku in trash bags, head down, hanging up in my closet. I use some old stuffing inside of the head to keep it round and from folding in on itself. This seems to be the best way to keep them safe, is cheap and easy to get ahold of, and seems to have the least amount of bending/wrinkling risks.
Hopefully this guide helps answer some of the basic lekku care questions – if you have any others not covered, please feel free to reach out to me! Thank you all, and twi’ on!~