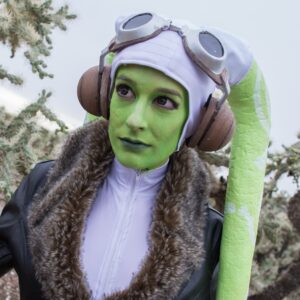
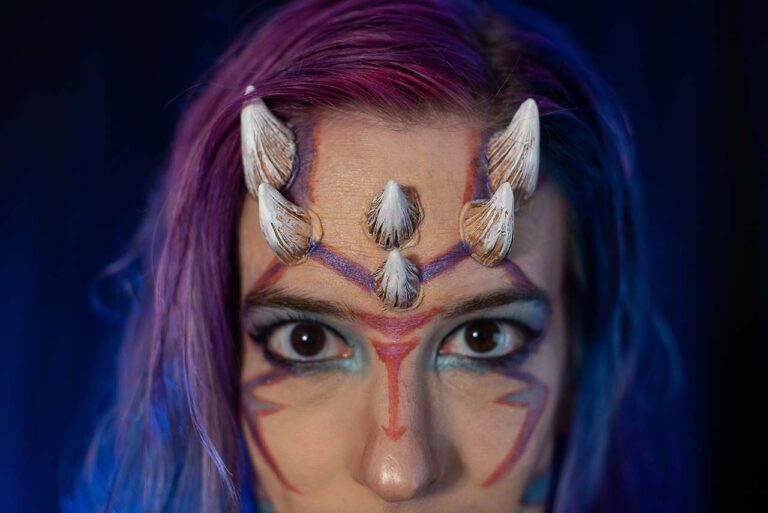
(Head’s up! Links in this article are affiliate links which means if you click on them I may get a (teenie tiny) bump back! Thanks for reading and supporting a self-employed artist! <3)
It’s coming up on that time of year when people venture out of their comfort zone and try something new… why not consider adding some face or body paint to your costume this year?! “But Amber!” you cry. “I don’t know where to start!”
I gotchu, boos. <3
In this article, I’m going to lay out all the things you need to know to tackle your very first face or body paint!


The Goals:
In this article I’m going to tailor my advice towards the following “Goals” –
- No or beginner knowledge level of body paint
- Cheap or accessible options for body paint
- No tools required beyond what can be purchased at a drugstore
- Wear time of 2-4 hours
- A foundation that will allow you to continue experimenting with face and body paint in the future
Gathering Materials
The first thing you want to do is collect the non-paint things you will require. The secret to making cheaper bodypaint last a long time is the same as how to make regular make up last a long time – give it a good foundation (aka primer!) to hold on to and seal it aggressively over the top. You will also need something to apply the paint. To that end, I recommend making sure you have the following things in your beauty arsenal:
- A great primer: honestly, any basic primer that is good for your skin can be used as a base for body paint. You’ll find that certain primers work better with your skin type and with body paints, but there’s no crime in starting with a basic one!
- Beauty Blenders or Foam Circles: in order to apply your paint, people use either brushes to literally ‘paint’ it on, or foam circles or beauty blenders to dab it on. I personally am an advocate of the “dab” technique (I’ll cover this later in application).
- Contour: your face isn’t a flat color, and it shouldn’t be after you’re painted up, either! To contour, you can use your paint mixed to different darker or lighter hues, or… eyeshadow!
- Nyx Palette: this is a great, cheap palette with a ton of colors that you can use as contours
- Setting Powder or Spray: I recommend powder for people who tend to be oilier and spray for those with more normal or dry skin. Powder will initially “dull” the color of your paint but this isn’t long lasting.
Choosing Your Paint
There are tons of options for body paint and more every day. I’ve assembled a few of the most accessible and cheapest options for you below.
- Snazaroo
- This is the paint available over the counter at Joann’s and Michaels. I do not recommend this paint – it’s cheap and accessible, but the risk that you will be frustrated and disappointed with the results are very high.
- Pros: cheapest of all the options; easy to locate with a good array of colors since it is available in stores
- Cons: limited wear time (I would expect an hour or two tops); prone to cracking if applied too thickly, and it’s easy to apply too thickly; hard to seal successfully especially if you make the mistake of getting a cream; not good for larger areas of coverage – it never fully sets meaning it will smudge everywhere
- This is the paint available over the counter at Joann’s and Michaels. I do not recommend this paint – it’s cheap and accessible, but the risk that you will be frustrated and disappointed with the results are very high.
- Ben Nye
- This is a decent starter paint available in many costume shops including many Halloween stores. You will have success if you prime and seal it but other paints wear better.
- Pros: cheap; can come in small or larger sizes; available in most Halloween stores; wide range of colors available; is fairly safe on sensitive skin
- Cons: limited wear time (2-4 hrs for their basic line, higher with the better quality products); multiple product lines that can be confusing; durability directly related to prep and sealing work
- This is a decent starter paint available in many costume shops including many Halloween stores. You will have success if you prime and seal it but other paints wear better.
- Wolfe
- My go-to for water-based paint especially for just painting my face. I love this paint, I have multiple colors of it and love its comfort during wear and its coverage. It is fragile as all water-based paints are, but sealing it can get you all day coverage.
- Pros: cheap, even with shipping charges; delivery is fast and since they come as pats shipping is not usually an issue; sometimes available in costume shops; great for sensitive skin; very solid coverage that will cover skin blemishes and tattoos easily
- Cons: fragile around water, as all water-based paints are; can be difficult during application if you rush the layers; wear time can be short (4ish hrs) or long (up to 8hrs) depending on care and sealing; some colors seem prone to very lightly staining skin for a day or so after wear
- My go-to for water-based paint especially for just painting my face. I love this paint, I have multiple colors of it and love its comfort during wear and its coverage. It is fragile as all water-based paints are, but sealing it can get you all day coverage.
- European Body Art Endura
- If you’re ready to try something a bit sturdier, I recommend EBA Endura. This is an alcohol-based paint that comes pre-mixed for airbrushes or to directly apply. I have, many times, used a latex round to apply this. This would be an ideal solution for someone who wants a water-proof paint job but for a smaller area.
- Pros: water-proof and sweat-proof, I’ve literally swam and showered in my Endura; can be slept in with minimal transfer to clothing so wear time is all day; can be layered underneath water-based paint to increase its durability; not harsh on skin; can be easily removed with coconut oil or charcoal-based soap
- Cons: more expensive by far; must be ordered and comes pre-mixed so has a limited shelf life; more translucent so must be layered carefully to avoid splotches – application can have a learning curve
- If you’re ready to try something a bit sturdier, I recommend EBA Endura. This is an alcohol-based paint that comes pre-mixed for airbrushes or to directly apply. I have, many times, used a latex round to apply this. This would be an ideal solution for someone who wants a water-proof paint job but for a smaller area.
Applying Your Paint
The secret to bodypaint is that a lot of your success is determined by the steps you take not only applying your paint, but before and after you apply your paint. Keep in mind everyone’s skin is different – this is how I am most successful but I encourage you to experiment to see what works for your particular skin.
- Prep the skin – wash with a gentle soap. Nothing too strong, because you don’t want to irritate the skin, but you want to get oils and dirt off. Once you do, use a light moisturizer to ensure that your skin isn’t dried out.
- Good foundation – apply your foundation as you would for normal makeup. At this point, I will also color-correct any blemishes if the paint I’m using is not opaque enough to cover them.
- Dab, don’t drag – there are several ways of applying water-based paints. The most common is to use a wide brush and to literally paint it on to your skin. This can be effective if you have a good saturation of paint, but can also lead to streakiness in the paint.
Instead, I favor dabbing. Take your expendable beauty blender or your cotton round rounded-over your finger and dab the paint onto your skin. Don’t worry about getting a perfect layer on your first go; get your skin covered, which will leave you with a splotchy layer. Let this layer dry completely – a solid five minutes – and if you have a sealant spray use it now. Then do a second layer.
Success in applying the second layer is all about honing in to how much paint you need – you want enough to leave a good layer after your dab but not so much that there’s excess moisture that will pull up the layer you have below. It takes a bit of practice, but you’ll get it! - Contour! – you are not a flat cartoon character. Contouring is an important step that will help make your bodypaint more convincing. You can follow contour tutorials for normal makeup, unless you’re trying to get a more specific shape, in which case I would look at reference photos in different lighting to identify where the highlights and shadows should be.
I usually use eyeshadow to contour my bodypaint – this works only if you’re careful about brushing the eyeshadow on lightly and building it up slowly, as you can’t wipe it off if you go too far and you can’t brush too aggressively because you’ll pull up your paint. You can also use your paint mixed with darker or lighter tones to get shadows. - Final touches – add any other makeup you need, such as eyeliner, lip liner, and eyelashes!
- Seal it! – use several good applications of your sealing powder, or several layers of your sealing spray, giving them several minutes to ‘rest’ and settle in between each application.
- Touch ups – especially with water-based makeup, accidents happen. I usually carry a bit of the bodypaint with me or an eyeshadow in a matching color to do any touch-ups throughout the day.
Clean Up
If you’ve used water-based paint, once you’re done, it’s as easy as washing your face to remove the paint. If you’ve used the Endura, coconut oil will take it right off. Either way, I recommend using a charcoal-containing soap to remove any final traces. Your sponges can be rinsed and re-used a couple of times.
Also make sure to let your paint pat dry out completely and wipe the top of it with alcohol before storing it for long periods of time so it doesn’t get moldy or gross!
Other Thoughts…
- Don’t forget to do a spot test! Reactions to water based paints are rare (I don’t know anyone personally) but better to be safe. Put a square on your inner arm and wear it for several hours to make sure you’ll tolerate it on your face.
- Get them eyebrows! I recommend, at minimum, making sure you define your eyebrows, eyelashes, and lips. It’s very easy for these details to get lost under the layer of paint; making sure they’re defined will make your paint job automatically look better.
- I recommend a trial run before the night of your event. This will give you time to see how long it’s going to take you and what you liked (and didn’t like!) about your paint job. It’s an extra step that will help out a lot in the long run
- Don’t worry if you feel like you did a “bad” job! Bodypainting is a skill and just like everything else the first time you do it you might find that you have a lot of learning to do. That’s okay! The second time will be even better.
I hope you enjoyed this primer –
now go forth, be creative, be kind, and be colorful!
